
Useful tips
Solar battery charge controller: how to choose MPPT or PWM correctly


The charge controller is not an «additional unit», but a control unit for the entire solar system. It limits the current from the panels, properly charges the battery and protects the battery from overcharging, deep discharge and reverse current at night. If you choose the wrong one, the system will operate unstable: the battery will quickly degrade, the inverter will turn off, and some of the energy will simply be lost.
For a private home, an apartment with backup power, or a small business, the choice usually comes down to two types: MPPT і PWM. In practice, the difference between them is not only in price. It affects the actual daily energy collection, compatibility with panels, permissible cable length, and efficiency in cold or cloudy weather.
When a user is looking for a charge controller solar battery buy, he often looks only at the amps. This is a mistake. It is important to consider the system voltage 12V, 24V or 48V, battery type, maximum open circuit voltage of the panels, current reserve and installation conditions. These parameters determine whether the system will be safe and whether the equipment will have to be replaced in a month.
The connection diagram, cable cross-section, the presence of protections and the ability to correctly configure the solar system for lead-acid or LiFePO4 batteries are also important for selection. In the electro shop catalog you can find both a simple PWM charge controller for basic solutions and a powerful mpt controller for solar panels for higher efficiency systems.
How a charge controller works and why is it needed?
The panels themselves cannot safely charge the battery. Their voltage and current vary depending on lighting, temperature and load. The controller stabilizes this process and supplies only the permissible charging mode to the battery. For 12V systems, this is especially critical, because even a slight excess voltage quickly kills the battery.
The controller performs three basic functions: charging, protection and switching. During charging, it forms the correct profile: bulk, absorption, float. During discharge, it turns off consumers so that the battery does not go into deep discharge. Additionally, it can limit the input current so that the panels and wiring do not operate in emergency mode.
In real-world facilities, this is immediately visible. For example, in a summer house with a pump, lighting, and router without a controller, the battery loses capacity in 2–3 months, while in a system with the right controller, autonomy remains stable even in the season with short daylight hours.
Marker: MPPT
MPPT or PWM: what is the technical difference?
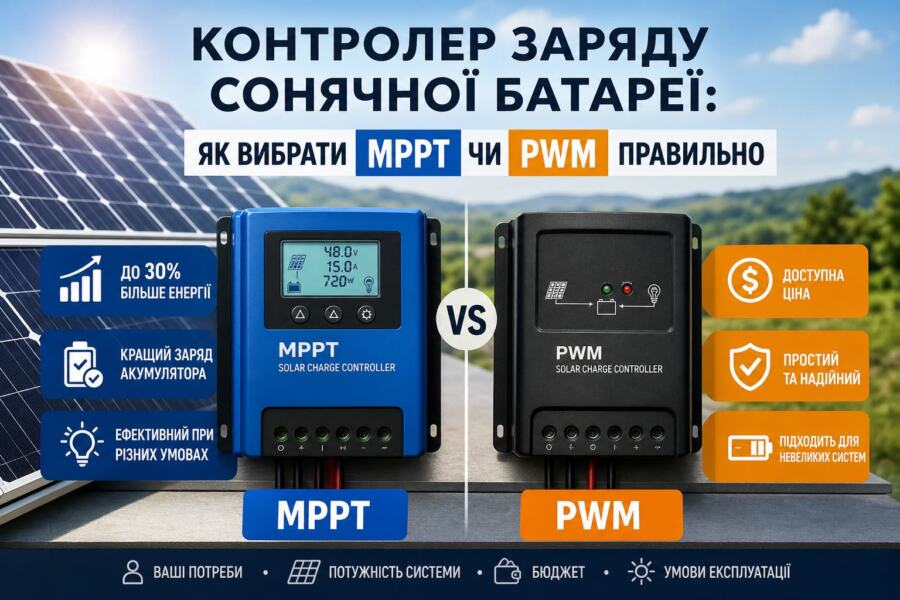
A PWM controller works like an electronic switch: it essentially «cuts» the voltage of the panels to the battery level. This is simple, cheap, and acceptable if the panel assembly is matched almost perfectly to the battery. That is why a PWM charge controller is often put in small budget systems with a few panels and short cables.
An MPPT controller works differently. It tracks the maximum power point of the panels and converts the excess voltage into useful charging current. If the panels produce, for example, 36V, and the battery is running on 12V, MPPT can harvest significantly more energy than PWM. In cold weather and in low light conditions, this advantage is even more noticeable.
For practical comparison, the following table is convenient:
| Parameter | MPPT | PWM |
| Efficiency | Higher, usually up to 95–98% | Lower, depends on panel alignment |
| Panels | Allows higher input voltage | Preferably close to battery voltage |
| Price | Higher | Lower |
| Scope of application | Homes, businesses, autonomous systems | Small systems, budget solutions |
The conclusion is simple: if you want the maximum return from every watt of sun, choose MPPT. If the system is small, the budget is limited, and the panels are selected without a voltage margin, PWM can also be a rational option.
How to choose the right controller for your system
You need to start not with the brand, but with the calculation. First, the voltage of the battery bank is determined: 12V, 24V or 48V. Next, the total power of the panels and the maximum charge current are calculated. For household systems, a simple estimate is often used: divide the power of the array by the battery voltage. For example, 600 W for 12V give about 50 A charger current taking into account losses and operating mode.
The second step is to check the voltage of the panels at idle. The MPPT controller must have a margin at the input, otherwise in frost the voltage may exceed the permissible limit. This is a typical installation mistake: people take a 100 V controller, and assemble two or three panels in a row so that in winter they get an excess already at the start.
The third step is battery compatibility. Lead-acid batteries require different charging thresholds than LiFePO4. If the controller does not support profile settings, the battery will either not charge or will constantly overcharge. For modern systems, it is desirable that the device allows you to set bulk, absorption, float and load cutoff voltages.
The fourth step is real operating conditions. If the panels are far from the controller, MPPT allows you to increase the voltage in the line and reduce the current, and therefore the voltage drop on the cable. This is important if there is a cable going to the roof. 10–20 m For PWM, this solution is less efficient because the controller operates closer to the battery voltage.
Installation, cables and common connection errors
The most common mistake is to connect the panels first, then the battery. For most controllers, the correct sequence is the reverse: first the battery, then the solar array. Otherwise, the device may not detect the system or go into emergency mode. This is a basic safety rule that is often ignored.
The second mistake is insufficient cable cross-section. If a large current flows through the line at low voltage 12V, losses grow very quickly. On short sections it is still possible to get by with a smaller cross-section, but at distances over 5–10 m accurate calculation is needed. Otherwise, some of the energy will be converted into heat, not into battery charging.
The third mistake is the lack of protection. Between the panels, the controller, battery and inverter There should be fuses or circuit breakers of the appropriate rating. For powerful systems, it is advisable to install a separate disconnection on each circuit. This simplifies maintenance and reduces the risk of fire.
The fourth mistake is installing it in a closed or hot place. The controller, especially the MPPT, generates heat. If it is installed in a cabinet without ventilation, it will reduce the current or go into protection. The housing should be dry, with air access and out of direct sunlight.
When to choose PWM and when to choose MPPT
PWM is appropriate if you have a small system with one or two panels, short cables and a limited budget. Such a PWM charge controller works well in simple circuits for lighting, small automation, summer cottage video surveillance or charging the backup battery.
MPPT is advisable when the panels have a higher voltage, the system is designed for daily operation, there is a refrigerator, pump, Internet equipment or other critical load. In frost, in cloudy weather and in partial shading, the difference in energy collection is noticeable. That is why for autonomous houses it is more often chosen mpt controller for solar panels.
Practical example: for a summer cottage with 2 panels of 200 W each and a battery 12V PWM may be acceptable. But if the panels are already 600–1000 W, there is a reserve on the roof and stable charging in winter is important, MPPT gives a noticeably better result without complicating the system.
Another criterion is scalability. If you plan to add panels over time, it is better to immediately take a controller with a margin of current and input. It is cheaper than changing all the electricity later. In stores that sell not only equipment, but also solutions for the task, it is easier to choose compatible models without technical conflicts.
Practical tips before buying and setting up
Before buying a solar charge controller, check four parameters: the nominal voltage of the system, the maximum charging current, the allowable input voltage from the panels, and the battery type. If at least one parameter is selected at the limit, the system will work worse in real operation than on paper.
For home or office use, it is better to choose a model with a display or interface to see the charging current, voltage and errors. For facilities with backup power, it is important to have temperature compensation and accurate load disconnection. For LiFePO4, be sure to check for the appropriate charging profile.
The solar system setup is not complete after connection. After startup, it is worth checking the battery voltage, cable temperature, real current from panels and controller behavior in peak solar time. If the voltage "fails" and the cables get warmer, the cross-section or connection diagram needs to be adjusted.
For safe and long-lasting operation, it is important to maintain the system: tighten the terminals, check for oxidation, monitor ventilation, and avoid mixing batteries of different states. This is especially important for autonomous solutions, where one weak cell can ruin the entire assembly.
Practical conclusion
For small and budget solutions, PWM may be sufficient, but for most modern home and commercial systems, MPPT provides better performance, higher stability, and more flexible settings. When choosing, focus not only on the price, but also on the parameters of the panels, batteries, cable length, and current reserve. This is how the solar charge controller will work without overloads and provide real energy independence.